Way More Than 40
No wait, more like 90 cloves of garlic. Okay, I get it! It's a bit excessive, but The Butcher (aka my boyfriend of 4.5 years) and I love garlic. Okay, okay, you got me again, I love garlic! The Butcher found it to be a bit overdone. Oh well- that's why we test recipes!
I am going to try to take you through a step by step process of how I made my Chicken with 40 Cloves last night. This is my first time doing this, so bare with me!
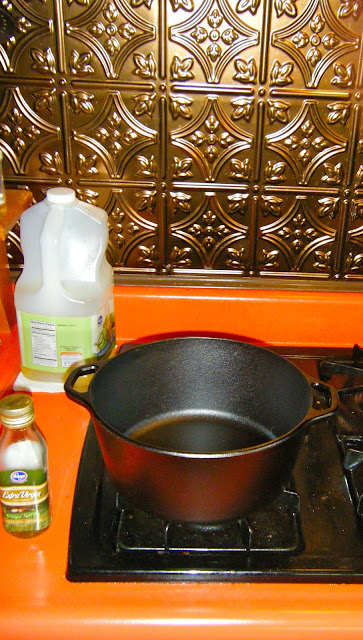
It all began with my expensive trip to the market (listen to me calling Kroger something that it doesn't deserve to be called- as if it's a Trader Joes or Whole Foods). Now, I'm not saying that the recipe is necessarily expensive to duplicate, it's just to say that I bought things that I probably didn't truly need at the moment (aka extra wine, a new dutch oven, and $8 kitchen towels).
(My New Dutch Oven)
For this recipe, you will simply need the following:
- A whole chicken
- 1.5 cups White Wine
- 3 Tbs Cognac/ Brandy (opt)
- 5 stems Thyme
- 4-5 Tbs Heavy Cream
- 40 Cloves of peeled Garlic
- Salt and Peppers
- 2-3 Tbs Flour
- 2 Tbs Butter
- 2-3 Tbs Olive Oil
- Zest of 1 Lemon
(The Myriad of Things Bought at "The Market")
I began the dish by prepping my ingredients, which included the whole chicken. This is a step that I allowed The Butcher to do. (He's a baker, deli clerk and meat cutter at one of our local grocery stores). It's not that I don't trust my meat cutting skills, it's just that I trust his more. He cut the chicken into 10 pieces, cause he's that good.
(The Butcher Doing His Thing)
When he was done butchering the chicken, I trimmed the fat and bones a little bit more myself.
(This is what I ended up with after trimming
and seasoning with S&P)
I then proceeded to heat the butter and oil in my dutch oven at a medium heat. Once heated I seared the chicken on both sides for a golden brown color (3-5 mins per side). Make sure you do this part in stages- about 3 large pieces, or 4 small pieces at once.
(The chicken browning in the pan)
After all the chicken has been browned, you remove it from the pan and set aside. Now, the fun part begins: cooking the forty cloves of garlic. There should be residual butter and oil left in the pan. Add the garlic to the pan, season with S&P and saute. Keep the garlic moving, as it is likely to brown easily. (You want it to be a lovely golden color). This step will likely take you anywhere between 5 to 10 minutes.
Now... I'm not entirely sure how to explain this... but I ended up making this dish with about 90 cloves. (I KNOW... CRAZY!) I used pre-peeled and packaged garlic- about 45 cloves per container. I love garlic and of course didn't want to waste any, so I used almost all of it. (We bought 3 packages; I used 2)
(Sauteed Garlic- B-E-A-U-tiful)
After the garlic was a golden color, I added all of the white wine, and 2 of the 3 tablespoons of cognac, along with the lemon zest and thyme. Once all of these ingredients are added to the pan, scrape the brown bits off the bottom and add your chicken back in. Cover with a lid and simmer for about 30 minutes to an hour. I only cooked mine for 30 mins and found that it could have become more tender, had I cooked it longer.
(Chicken before it simmered)
As the chicken was simmering, I decided to prepare a side dish of pearled couscous (the food so nice, they named it twice). I used a prepackaged couscous from the Near East company. It was simple and easy- just follow the directions on the box!
(as if we didn't have enough garlic flavor going on)
Finally, once the chicken was done simmering and the liquid in the pan had reduced, it was time to make the sauce. I removed the chicken and about half of the softened garlic from the pan. And mind you guys, the garlic not only softens, but the flavor also becomes really mellow. So it's not going to overwhelm your taste buds. Anyways, at this point I added the rest of the cognac to the pan, along with the flour, cream and more S&P (YES, you really have to season it again). Then I whisked like crazy, making sure there were no lumps of flour- lumps of garlic- Okay! The sauce should thicken pretty nicely. And to be honest, this was my favorite part of the entire dish (super flavorful)!
(The sauce, in all its glory)
At this point it was finally time to plate. And while the meal was very "yellow," and very garlicky, it was so super tasty. I dare you to give this one a try. I don't think you'll be disappointed.
(Served with my favorite Sourdough Bread)
Even the cat got in on the dinner time action:
I hope you all enjoy this recipe. Please comment if you have any questions! And PS- thanks for being patient on my first How-To Recipe!


Comments
Post a Comment